Saturday, February 18, 2023

Python Sqlite3 CRUD with Pandas: A simple Tutorial

 Python is a popular programming language known for its simplicity and versatility. One of its most commonly used modules is sqlite3, which allows developers to work with SQLite databases. SQLite is a lightweight database management system that is widely used for small-scale applications.


In this article, we will explore how to use the sqlite3 module in Python and pass query results to a Pandas dataframe. We will start with a basic program that creates a table, inserts some data, updates the data, deletes a record, and then retrieves the data.


The first step is to import the necessary modules: sqlite3 and pandas. We also need to create a connection object to connect to the SQLite database.

1
2
3
4
import sqlite3
import pandas as pd

conn = sqlite3.connect('msgDb.db')

We then create a cursor object, which we will use to execute SQL commands. We define a table name and create a table if it doesn't exist.

1
2
3
4
c = conn.cursor()
table_name = 'msgs'
sql = 'create table if not exists ' + table_name + ' (id integer, msg char, status char)'
c.execute(sql)

Next, we insert a record into the table using an INSERT command. We then commit the changes to the database.

1
2
3
conn.execute("INSERT INTO msgs (id, msg, status) "
             "VALUES (2, 'FRIEND--john--dan--hi', 'SENT')")
conn.commit()

We retrieve all records from the table using a SELECT command and print the results to the console.

1
2
cursor = conn.execute("SELECT * from msgs")
print(cursor.fetchall())

We then update a record in the table using an UPDATE command and commit the changes.

1
2
conn.execute("UPDATE msgs set status = 'DELV' where ID = 1")
conn.commit()

We again retrieve all records from the table and print the results to the console.

1
2
cursor = conn.execute("SELECT * from msgs")
print(cursor.fetchall())

We then delete a record from the table using a DELETE command and commit the changes.

1
2
conn.execute("DELETE from msgs where ID = 2;")
conn.commit()


Finally, we retrieve all records from the table using a SELECT command and pass the query result to a Pandas dataframe. We print the first few records and the number of records in the dataframe to the console.

1
2
3
df = pd.read_sql_query("SELECT * from msgs", conn)
print(df.head())
print(len(df))

This program demonstrates some of the basic commands used in sqlite3 and how to pass query results to a Pandas dataframe. However, this is just the tip of the iceberg. sqlite3 has many more advanced features that allow you to manage and manipulate data in more complex ways.

In conclusion, sqlite3 is a powerful and easy-to-use module that allows Python developers to work with SQLite databases. When combined with Pandas, it becomes even more powerful, allowing you to perform advanced data analysis and manipulation tasks. If you are working with small-scale applications or just starting out with databases in Python, sqlite3 is an excellent place to start.

Here is the complete code:

 1
 2
 3
 4
 5
 6
 7
 8
 9
10
11
12
13
14
15
16
17
18
19
20
21
22
23
24
25
26
27
28
29
30
31
32
33
34
35
36
import sqlite3
import pandas as pd
conn = sqlite3.connect('msgDb.db')

c = conn.cursor()
table_name = 'msgs'

sql = 'create table if not exists ' + table_name + ' (id integer, msg char, status char)'
c.execute(sql)

conn.execute("INSERT INTO msgs (id, msg, status) "
             "VALUES (2, 'FRIEND--john--dan--hi', 'SENT')")


conn.commit()

cursor = conn.execute("SELECT * from msgs")
print(cursor.fetchall())

conn.execute("UPDATE msgs set status = 'DELV' where ID = 1")
conn.commit()

cursor = conn.execute("SELECT * from msgs")
print(cursor.fetchall())


conn.execute("DELETE from msgs where ID = 2;")
conn.commit()

cursor = conn.execute("SELECT * from msgs")
print(cursor.fetchall())

df = pd.read_sql_query("SELECT * from msgs", conn)
print(df.head())
print(len(df))
)

I would also use this Sqlite3 database to my chat application project which will serve as the back end database of client application 

Thursday, February 16, 2023

Display a Ruler on top of a QTextEdit Widget

I am trying to mimic a typical Wordprocessor document as part of my ongoing Chat Application project with an Integrated Development Environment(IDE) and which slowly evolving to have a Content management System(CMS) module. Having the said module should have at least a ruler be displayed on top of the Code Editor pane(QTextEdit Widget) . SO far, I have come up with the following sample program . But first here is the screenshot:


And here is the code:

 1
 2
 3
 4
 5
 6
 7
 8
 9
10
11
12
13
14
15
16
17
18
19
20
21
22
23
24
25
26
27
28
29
30
31
32
33
34
35
36
37
38
39
40
41
42
43
44
45
46
47
48
49
50
51
52
53
54
55
56
57
58
59
60
61
62
63
64
65
66
67
68
69
70
71
72
73
74
75
76
77
78
79
80
81
82
83
84
85
86
87
88
from PyQt5.QtWidgets import QApplication, QMainWindow, QWidget, QVBoxLayout, QTextEdit
from PyQt5.QtGui import QFont, QFontMetrics, QPainter
from PyQt5.QtCore import Qt
from PyQt5.QtGui import QPen

class Ruler(QWidget):
    def __init__(self):
        super().__init__()

        # Set up the widget
        self.setFixedHeight(20)
        self.font = QFont('Arial', 5)
        self.font_metrics = QFontMetrics(self.font)
        self.text_edit = None

    def set_text_edit(self, text_edit):
        self.text_edit = text_edit
        self.text_edit.cursorPositionChanged.connect(self.update)

    def paintEvent(self, event):
        if not self.text_edit:
            return

        painter = QPainter(self)

        # Set up the white background
        painter.fillRect(self.rect(), Qt.white)

        # Get the metrics for the font
        painter.setFont(self.font)
        font_metrics = self.font_metrics

        # Draw the tick marks and text labels
        x_pos = self.text_edit.horizontalScrollBar().value()
        width = self.width()
        step = font_metrics.width(' ') * 5

        for x in range(x_pos % step, width, step):
            if x % 100 == 0:
                painter.drawLine(x, 0, x, 5)

                # Center the text labels to the lines
                label_width = font_metrics.width(str(x))
                label_x_pos = x - label_width / 2
                label_y_pos = 15
                painter.drawText(int(label_x_pos), int(label_y_pos), str(x))
            elif x % 50 == 0:
                painter.drawLine(x, 0, x, 3)
            elif x % 10 == 0:
                painter.drawLine(x, 0, x, 1)
         # Draw the red line at the current mouse position
        #painter.setPen(QPen(Qt.red, 1))
        #painter.drawLine(self.mouse_pos.x(), 0, self.mouse_pos.x(), self.height())
    #def mouseMoveEvent(self, event):
    #    pos = event.pos()
    #    self.mouse_x = pos.x()
    #    self.update()  
class MainWindow(QMainWindow):
    def __init__(self):
        super().__init__()

        # Set up main window
        self.setWindowTitle("Ruler Example")
        self.setGeometry(100, 100, 800, 600)

        # Set up text editor
        self.text_edit = QTextEdit()
        self.setCentralWidget(self.text_edit)

        # Set up ruler
        self.ruler = Ruler()
        self.ruler.set_text_edit(self.text_edit)

        # Set up layout
        layout = QVBoxLayout()
        layout.addWidget(self.ruler)
        layout.addWidget(self.text_edit)

        # Set the layout for the main window
        central_widget = QWidget()
        central_widget.setLayout(layout)
        self.setCentralWidget(central_widget)

if __name__ == '__main__':
    app = QApplication([])
    window = MainWindow()
    window.show()
    app.exec_()

I will include this in the next upgrade of my Chat Application project.


Friday, February 10, 2023

Creating a Debugging Window with PyQt

This is still part of my Chat Application Project. Trying to enhanced my IDE to include a debugging window. 

Debugging is a crucial aspect of software development and it requires a lot of attention and effort to ensure that the code is free of bugs and runs smoothly. Debugging can be done in a variety of ways, but one of the most popular methods is to use a debugger window. A debugger window provides an interactive interface for the developer to monitor and control the execution of the program.

One approach to creating a debugger window is by using PyQt, a popular GUI framework for Python. PyQt provides a way to embed a terminal window into a PyQt application, which can be used as a debugging window. By doing this, developers can run their code and view the output directly in the PyQt application, making it easier to monitor and debug their code.

The PyQt debugger window consists of a command execution button, a QLineEdit to enter the OS command, and a QTextEdit to view the result of the command. The program uses the subprocess library in Python to run the code, which is entered in the QLineEdit, and the output is displayed in the QTextEdit.

One of the advantages of using PyQt to create a debugger window is that it provides a convenient and interactive way for developers to run their code and view the output. With the debugger window embedded in the PyQt application, developers can quickly view and debug their code without having to switch back and forth between different windows or tools.

In conclusion, creating a debugger window with PyQt is a great approach for software development. It provides an interactive and convenient way for developers to monitor and control the execution of their code, making the debugging process much easier and efficient. The ability to embed a terminal window in a PyQt application is a powerful feature that can greatly enhance the debugging process and make it easier for developers to identify and fix any bugs in their code.. 

Here's my planned logic:

  • Create a function that will allow a programmer to insert a breakpoint
  • If no breakpoint is inserted, debugging starts on the first executable line
  • The debug window should embed the cmd terminal(this is dificult to implement)
  • Debug window should display the code and the current line where it stopped
  • To pause a program, I will insert an invisible input command at each line but when a breakpoint is specified autmatically will remove the input command before the breakpoint is reached
  • User will enter the variable name at the input terminal to display the current value


So far, I have succeeded embedding the cmd terminal into a PyQt and allows me to interact with it. Here the source code:

 1
 2
 3
 4
 5
 6
 7
 8
 9
10
11
12
13
14
15
16
17
18
19
20
21
22
23
24
25
26
27
28
29
30
31
32
33
34
35
36
37
38
39
40
import sys
from PyQt5.QtCore import QProcess, QTextStream
from PyQt5.QtWidgets import QApplication, QMainWindow, QTextEdit, QLineEdit, QVBoxLayout, QHBoxLayout, QWidget, QPushButton

class MainWindow(QMainWindow):
    def __init__(self):
        super().__init__()

        self.process = QProcess(self)
        self.output = QTextEdit(self)
        self.input = QLineEdit(self)
        self.run_command_button = QPushButton("Run Command", self)

        layout = QVBoxLayout()
        input_layout = QHBoxLayout()
        input_layout.addWidget(self.input)
        input_layout.addWidget(self.run_command_button)
        layout.addLayout(input_layout)
        layout.addWidget(self.output)
        central_widget = QWidget(self)
        central_widget.setLayout(layout)
        self.setCentralWidget(central_widget)

        self.process.readyReadStandardOutput.connect(self.read_output)
        self.run_command_button.clicked.connect(self.run_command)
        self.process.start("cmd.exe")

    def read_output(self):
        stream = QTextStream(self.process)
        self.output.append(stream.readAll())

    def run_command(self):
        command = self.input.text() + "\n"
        self.process.write(command.encode())

if __name__ == '__main__':
    app = QApplication(sys.argv)
    window = MainWindow()
    window.show()
    sys.exit(app.exec_())

I tried to test it if I can interact with it using the program below and to run it I just enter into the qlineedit textbox the following: "python prog_name.py" and it ask my name and enter my name on the same textbox and the result is the following:


Here is the code of the example program:

1
2
3
print("Enter your name: \n")
x = input()
print(x)

As a final conclusion, I think I am on the right track. I am optimistic that the debugger window will be up and running soon. Also, auto indentation is already working but not yet uploaded to my github page. The implementation is surprisingly very simple. I did not have to use machine learning.

Wednesday, February 8, 2023

Python PyQt program and MySQL as a backend with a Model View Controller (MVC) design pattern

Introduction

The Model View Controller (MVC) design pattern is a widely used pattern for designing graphical user interfaces. It separates the data (model), the presentation (view), and the control (controller) of an application. This pattern allows for a clear separation of concerns and provides a more organized and maintainable codebase.

In this article, we will be discussing a Python PyQt program that uses MySQL as a backend, utilizing the MVC design pattern. This program is designed to display data from a database in a data grid, and show the details of a selected row in a QTextEdit widget.


Program Overview

The program consists of three main components: the Model, the View, and the Controller. The Model class is responsible for retrieving the data from the database and storing it. The View class displays the data in a data grid and the Controller class acts as the mediator between the Model and View, handling the interactions between them.


The Model

The Model class is responsible for retrieving the data from the database and storing it. It connects to the database, fetches the data, and closes the connection. The data is then stored in a variable for later use. This class also overrides the rowCount and columnCount methods to return the number of rows and columns in the data, respectively. The data method returns the data at a given index.


The View

The View class is responsible for displaying the data in a data grid. It is a QTableView widget and sets the selection behavior and mode to allow for the selection of rows. The EditTriggers property is set to NoEditTriggers to prevent the user from editing the data in the grid.


The Detail View

The DetailView class displays the details of a selected row in a QTextEdit widget. It is set to be read-only to prevent the user from modifying the details.


The Controller

The Controller class acts as the mediator between the Model and View, handling the interactions between them. It creates instances of the Model and View classes and sets the View's model to be the Model. The Controller class also defines the showDetails method, which is called when a row in the data grid is selected. This method retrieves the data for the selected row and sets it as the text in the DetailView widget.


Conclusion

This Python PyQt program and MySQL as a backend with a Model View Controller (MVC) design pattern provides a clear and organized way to display data from a database. The separation of concerns in the MVC pattern makes the code more maintainable and easier to understand. Whether you are a beginner or an experienced programmer, this program can serve as a useful example of how to use the MVC pattern in your own projects. 


Here is the code:

 1
 2
 3
 4
 5
 6
 7
 8
 9
10
11
12
13
14
15
16
17
18
19
20
21
22
23
24
25
26
27
28
29
30
31
32
33
34
35
36
37
38
39
40
41
42
43
44
45
46
47
48
49
50
51
52
53
54
55
56
57
58
59
60
61
62
63
64
65
66
67
import sys
from PyQt5 import QtCore, QtGui, QtWidgets
import mysql.connector

class Model(QtCore.QAbstractTableModel):
    def __init__(self, parent=None):
        super(Model, self).__init__(parent)
        self.loadData()
        
    def loadData(self):
        self.db = mysql.connector.connect(
            host="localhost",
            user="root",
            password="password",
            database="database"
        )
        self.cursor = self.db.cursor()
        self.cursor.execute("SELECT * FROM table")
        self.data = self.cursor.fetchall()
        self.cursor.close()
        self.db.close()
    
    def rowCount(self, parent=QtCore.QModelIndex()):
        return len(self.data)
    
    def columnCount(self, parent=QtCore.QModelIndex()):
        return len(self.data[0])
    
    def data(self, index, role=QtCore.Qt.DisplayRole):
        if role == QtCore.Qt.DisplayRole:
            row = index.row()
            column = index.column()
            return self.data[row][column]

class View(QtWidgets.QTableView):
    def __init__(self, parent=None):
        super(View, self).__init__(parent)
        self.setSelectionBehavior(QtWidgets.QAbstractItemView.SelectRows)
        self.setSelectionMode(QtWidgets.QAbstractItemView.SingleSelection)
        self.setEditTriggers(QtWidgets.QAbstractItemView.NoEditTriggers)

class DetailView(QtWidgets.QTextEdit):
    def __init__(self, parent=None):
        super(DetailView, self).__init__(parent)
        self.setReadOnly(True)

class Controller(QtWidgets.QWidget):
    def __init__(self, parent=None):
        super(Controller, self).__init__(parent)
        self.model = Model(self)
        self.view = View(self)
        self.view.setModel(self.model)
        self.view.clicked.connect(self.showDetails)
        self.detail_view = DetailView(self)
        layout = QtWidgets.QVBoxLayout(self)
        layout.addWidget(self.view)
        layout.addWidget(self.detail_view)
        
    def showDetails(self, index):
        row = index.row()
        details = ",".join([str(x) for x in self.model.data[row]])
        self.detail_view.setPlainText(details)

if __name__ == '__main__':
    app = QtWidgets.QApplication(sys.argv)
    controller = Controller()
   

Monday, February 6, 2023

Chat Application Second Upgrade

 The Chat Application Second Upgrade


Ovr two weeks ago, I upgraded my chat application to have a user interface and create a notification everytime a new message arrives. Today, I am happy to announce that it got another upgrade. As a summary, changes implemented are the following:

  1. It handles multi clients similar to a chatroom. The previous version only allows 1 client at a time.
  2. The gui is now using Multiple Document Interface which allow users to chat with their friends on a separate subwindow or mdi child window with just a click, it is also the same with a room chat
  3. The friends list is now being retrieved from the back-end Mysql database. 
  4. Users can broadcast the message to the whole group or sends the message to  one member only
  5. Users have to enter their alias before connecting
  6. The server no longer participates in the chat, it now functions as a message broadcaster
  7. Users can connect and disconnect anytime.
  8. Users using different computers but connected on the same network may now communicate using this chat program.
  9. Added a Integrated Development Environment to facilitate bug tracing and simplify testing.
  10. Added a planner at the files list panel of the IDE to keep track of my daily activities and at a glance, I know where to start or what to do next.


The Multiple Document interface(MDI)

The MDI is a container that may contain several subwindows or mdi children. These subwindows may display a document or a data entry screens like creation of common business transactions but in this case, chat windows since I am developing primarily a chat application. Having said that, the creation of chat subwindows, communication may take place in several instances all at the same time involving several devices. The creation of subwindows in a chat application is a little bit more challenging because each subwindow will be created by the same code, which when several instances were opened at the same time may cause confusion, unlike in visual basic, creation of several instances of subwindows will automatically assign a unique index number for that instance making it easily distinguishable from the rest of all other instances, in PyQt6 it does not do that, but it can be easily achieved by isolating the definition of the contents of the subwindow making it(MDI container) aware of the unique instances of each individual subwindows. 


The Communication Protocol

With the use of MDI, users can now open unlimited subwindows at the same time to communicate with their friends and participate in a discussion in their communities. Developing an application that involves communication between several devices, having too many instances all at the same time, and making sure that the message is delivered to the intended receiver, a communication protocol must put in place and it can not be avoided no matter how I make the program as simple as possible. In this application, I have implemented a four layer model on top of the existing protocol used by sockets. The first layer contains the type of intended recipient(It is either a friend or a room or a public chatroom), the second layer is the sender, the third layer is the recipient(it could be the friend, room or the public chatroom) and the fourth layer is the message. There is also a communication handshake wherein the server will send a keyword like in this case, I used 'USER' and the recipient will automatically send the entered alias. After the handshake, the server will broadcast that the user has joined the chat or is online. The message should contain a keyword 'JOIN'. There is also another keyword I used to notify the community that the user has left, and the keyword is 'ALERT'. This might change when the encryption feature is implemented. I have prepared a complete list of protocol or agreed communication format(see the 'protocol' on the left side panel if you are using the builtin IDE or the protocol.txt file at the root directory of this project) for details and guide how the design was implemented.


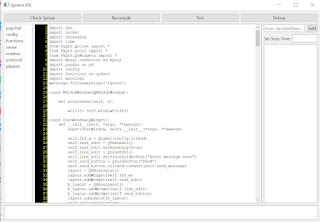
The Integrated Development Environment(IDE)

I am encountering a lot of bugs and having difficulty in testing(I have to create at least 3 instances of the chat application and another instance of the server application and I have to arrange/resize all these windows to fit on an 11.3-inch screen), it is such a tedious and repetitive task that makes the development of this chat application too complex and boring. To get rid of this issue, I have decided that I have to copy the IDE I have implemented on my PyQt6 Desktop Application Template. The original IDE consist of 2 buttons(Syntax Checker and Recompile), a text editor that displays the code and where the code is edited at the same time and at the bottom is the error pane. This IDE is already functioning well but I have further enhanced it to include line numbers at the code editor section which is quite difficult to implement but after several hours of research, I have managed to make the changes and improvements work. Another significant improvements on this new IDE are the capability of this IDE to edit text files(usually documentation files but planning to make more improvements in the future to include jinja2 templating to enable this IDE to be capable of producing documents that include images, embed videos and better graphical user interface. Note that I have edited this text document on this new IDE), I also added text-to-speech to help in proofreading the document, a separate list widget on the left panel that displays all the files used in this project which when clicked should display the code for editing and on the right most panel are list of variables that I want to monitor during debugging and below it is the document version management system(This is different from the planned version management mention on the next paragraph because it will just be for the numerous documentation files I am planning to maintain within this IDE) but this is still not working on this upgrade. I have observed that with more text documents being added as time goes by, this IDE is slowly evolving to include a Content management System which is a great idea to include this module into the IDE. Note that this IDE is created specifically for this project which means all files are hard coded. I may create a dedicated project just for this IDE which I think will increase productivity of many if not all Python Software Developers like me.


Features not implemented but planned to include in the next upgrade

  1.    Messages should have three statuses(sent, delivered and read)
  2.    Each message should have timestamp
  3.    Unread messages should not be lost when another message arrives
  4.    Messages should be saved on the MySql Database at the server  so that when users login to a different terminal, he can still read the messages 
  5.    Messages should be saved to a local Sqlite3 database so that network will be minimized.
  6.    A fifth layer in the communication protocol must be added and it should contain the encrypted password of the user
  7.    A sixth layer in the communication protocol must be added and it should contain  a code as key that to the server assigned challenge to the user and the terminal that user is using(still in draft therefore subject to change).


Planned Features

With these changes, the chat project is beginning to be a full chat application but I still need to add more features though like the ability of the server to moderate the chatroom, ban or kick out users that frequently sends spam messages, add encryption features so that messages will not be intercepted by hackers as seen on my previous post(A simulation of a Cyber Attack), the freinds and rooms and other data of the user should come from the server upon getting authenticated and will send to user then the client app will save the friends list and rooms list of the user to a local sqlite3 database(this will only happen when the user logs in from another terminal), add screen sharing and call conferencing, integrate an sms/email engine features, and so on, not to mention the features I have mentioned on my previous post which includes adding a user timeline, integrate that timeline to the user's facebook, twitter and linkedin timelines, add user management system(I gave an overview on this system on my previous post and has published a working prototype on my PyQt6 Desktop Application Template series), a project management system (this is composed of several modules like organizing a team, schedule a meeting, create a project repository, version management system, and reporting), add user dashboards(this should give the user a glimpse of what's happening in the community he joined, analyze his clout in the social media space by accessing his twitter, facebook and linkedin data and activities logs) and user appointment calendar. Other features I have thought to include are the following: there will be a community chatrooms organized according to certain topics and interests which is a good way to interact with strangers but you both share common interest like a discussion about astronomy, science, current events, etc. There might also be a market place where a user can create his own room exclusive for the merchandise he is selling. The seller can accept payment, issue invoice, official receipts, etc which is very much like a typical online stores like Lazada, Shopee and others. Add capability of a user to broadcast his messages across all rooms/chat windows depending on a user's previledges, this feature may also be used for important announcements. And last feature I have in mind is to enhance further the IDE with modules like interactive debugging, code inspector, code syntax hilighter, should have integration with github for version management and automation of uploading to my online github repository and so much more.


The File Structure and System Architecture

I know that the developers community look for this particular section in every article  dealing with this kind of topics. I will just give an overview of the File Structure and System Architecture in this section. They look for this information because they consider this as the real heart and soul of the project. For me, I look for this section particularly because it determines the real value of the project. Just like in my on going Python-Flask User Management System, I will be adopting some of the file names, variable decalaration, updating of these global variables and the model-view-controller design pattern or also known infamously as clean architecture. 


I am getting excited about the progress of this tiny project which slowly becoming a huge system that everyone can benefit from with its numerous features as envisioned by me.

If you made it this far, you have the previlidge to download the source code at my github page. Popchat

How to check if Windows Defender is Blocker an Application

To check if Windows Defender is blocking some functions of an app, follow these steps:

  1. Open Windows Defender Security Center
  2. Go to the "Virus & threat protection" section
  3. Click on "Manage ransomware protection"
  4. Check the "Controlled folder access" section

If the app you're trying to run is listed under "Blocked apps and files", Windows Defender is blocking it.


You can also check the Windows Event Viewer to see if Windows Defender has logged any blocking events. To do this, follow these steps:


  1. Press Windows key + X and select Event Viewer
  2. Go to Windows Logs > Security
  3. Look for events with Event ID: 1116

The description of the event will tell you if Windows Defender has blocked a file or process.

If you trust the app and want to allow it to run, you can add it to the list of allowed apps in Windows Defender.